User-Specific Content (And Downloads!) in LearnDash
Hi [First Name], here are your courses!
[LearnDash Profile block here]
That’s an example of something that is slightly personalized because first names and enrolled courses can vary per user.
Although not quite the kind of user-specific content I’m thinking of.
Hey Leland, I reviewed your assignment.
Not bad although do be mindful of the WordPress coding standards. On line 13, there should have been a yoda condition.
The final result will be the same although employers do require compliance with coding standards, so best to get in the habit now!
Download this 2-minute screencast so you can see my line-by-line code review. Let me know if you have any questions!
Whoa! Now that’s some personalized service.
If you’ve ever wondered how to give your students user-specific feedback in the form of text and downloads…
…help keep such content only available to a specific WordPress user account, we’ll show you how in this tutorial!
The content portion involves core functionality from LearnDash and requires no additional charge.
Step #1: Set Up Your User-Specific Content Page
In this tutorial, we’ll set up a single page where the WordPress site admin can manage the user-specific content of multiple users.
We’ll call our page Student Feedback (as in, a page where students receive feedback) although you can name it whatever you want to better fit your use case.
Step #1.1: Make the Student Feedback page
In your WordPress backend:
- Go to Pages → Add New
- Name the page “Student Feedback”
- Press the Publish button

No content is needed for now.
Step #1.2: Add some “before and after” content for all users
Feel free to copy and paste the following to follow along:
Please see your feedback below!
USER-SPECIFIC CONTENT HERE
If you have any questions about any feedback, shoot an email to [email protected] and I’d be glad to discuss further!
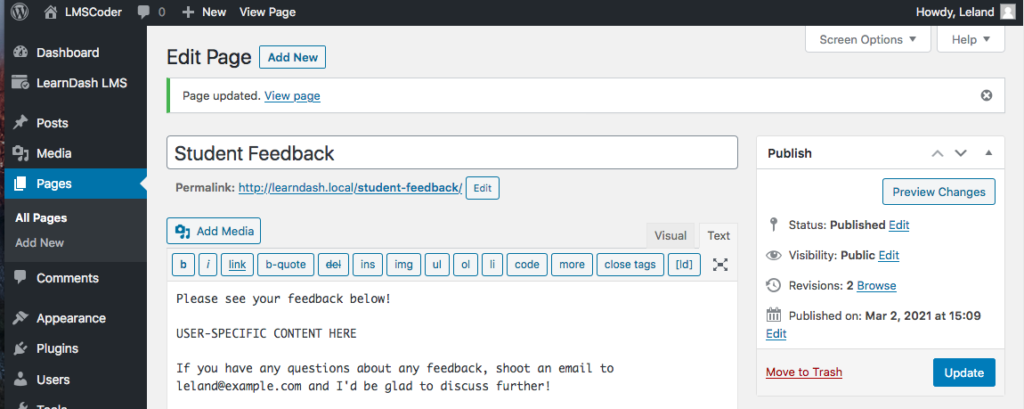
Consider “USER-SPECIFIC CONTENT HERE” the placeholder for actual user-specific content.
Anything above it is our “before” content where we can introduce what this page is for.
Anything below it is our “after” content where we can invite our students to follow up with any questions.
Step #1.3: Set up THREE test user accounts
I’ve set mine up like so.
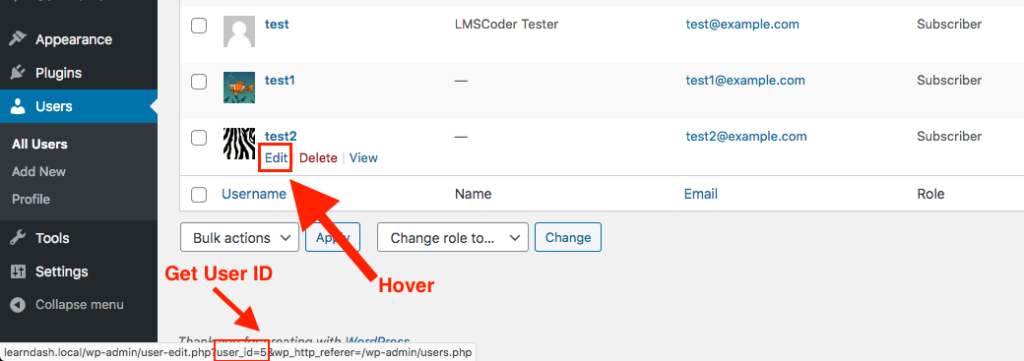
Note the WordPress User ID of each. You can get that by hovering over the Edit link and checking the target URL in the browser status bar.
Also, all of these test users should be in addition to your one WordPress admin user account.
Easy peasy so far. Time to get into the good stuff!
Step #1.4: Set up your user-specific content
We will be using the the LearnDash [student] shortcode to achieve this.
I will be setting up user-specific content for the following two users:
Username: test
User ID: 2
Username: test1
User ID: 3
course_id parameter is always required with the [student] shortcode.
With that said, if the shortcode is placed within a course, it is automatically factored in for you and does not need to be explicitly defined.
Since we are placing this shortcode outside of a course (on a random page), we do need to specify the course_id parameter.
These two users will both be enrolled in Course ID: 29790
You will want to note the User ID for user-specific content, and the username for user-specific downloads.
Username test2 (User ID: doesn’t matter) will be our “control” user, and have no user-specific content.
In between your before and after content set up in Step #1.2, insert the following and adjust the user IDs accordingly:
[student user_id="2" course_id="29790"]Wow, you are literally the worst student I’ve ever seen.
I hope you drop out soon because this is just a waste of time for everyone.[/student]
[student user_id="3" course_id="29790"]Wow, honestly you should be teaching this class because you are so great at this course.
I hope you drop out soon so you don’t replace me one day as the #1 course instructor for this subject.[/student]
Whoa, kind of a mean and insecure teacher, although I digress.
Step #1.5: Test the user-specific content
This is a great use case for a plugin like User Switching.
You could also reset/get the passwords of each user, and login with a bunch of different browser sessions for a more “authentic” experience.
Anyhoo, if all is well, you should see the following for User ID 2 (the bad student):

And this for User ID 3 (the great student):
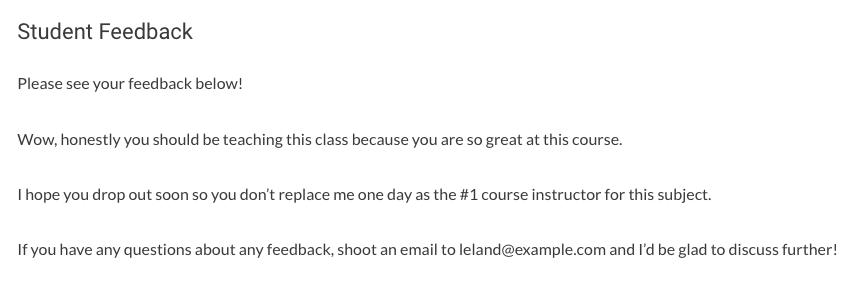
And this for our control user:

Oh, and this for our admin user:

(Hint: it may look exactly like the control user, screenshotted above).
Okay, we’re all set for user-specific content. Although not all user-specific resources are a good fit for content.
Sometimes you may want user-specific downloads (video files, PDFs, Excel spreadsheets, or other files not meant for embedding) as well.
We’ll get to that next!
Step #2: Set Up User-Specific Downloads
When we say user-specific, we mean user specific.
That means, if one user tries to download another user’s user-specific file, they should not be able to.
To facilitate this, we’ll use a plugin called Download Monitor.
Download Monitor is a plugin I’ve used off-and-on for several years and it “just works” in my experience.
Step #2.1: Buy the Advanced Access Manager addon
It costs $39 at the time of this writing.
While I did a quick search for a free alternative, I couldn’t find one.
If you did, feel free to use that. This tutorial is more about a high-level concept rather than a prescription to use particular plugins.
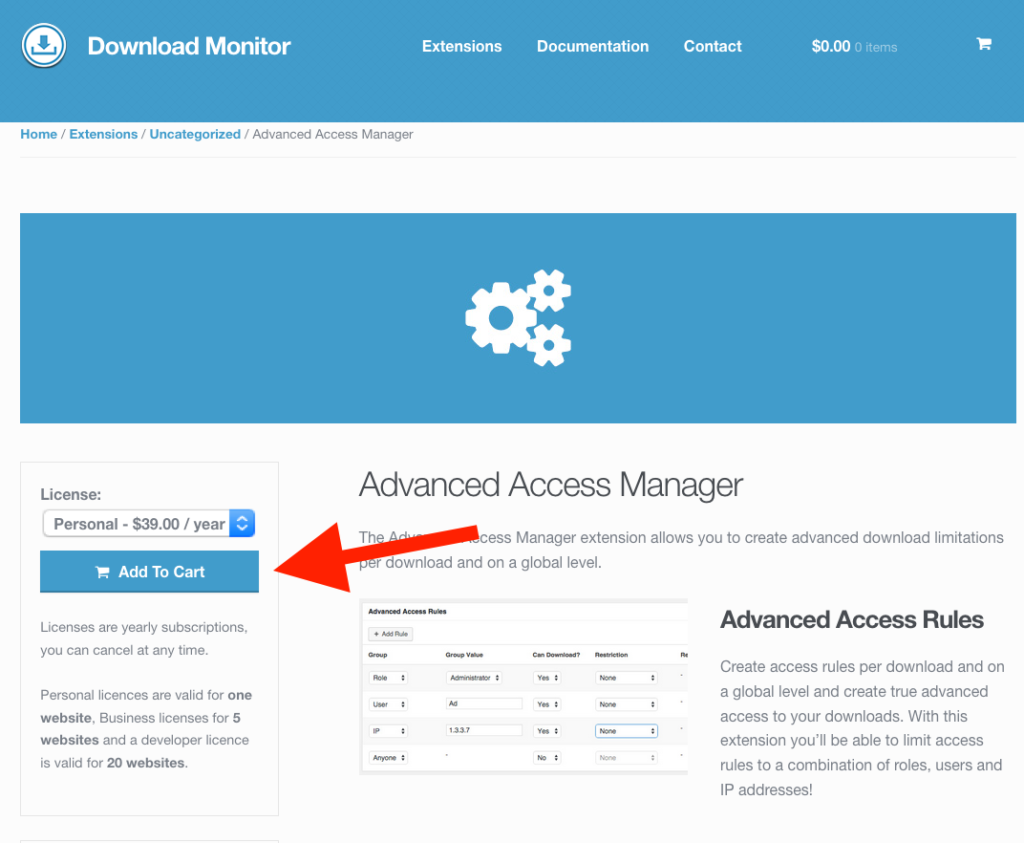
Otherwise, I think $39 is a fair value and I bought it myself, literally just so I could make this tutorial.
Not to mention, saving several hours of my time in trying to recreate the same functionality that already exists.
If you don’t want to pay, or don’t need the functionality offered by this plugin, feel free to end the tutorial here.
Step #2.2: Install the Download Monitor plugin
Download Monitor has a “freemium” business model, and the core Download Monitor plugin is available for free on WordPress.org.
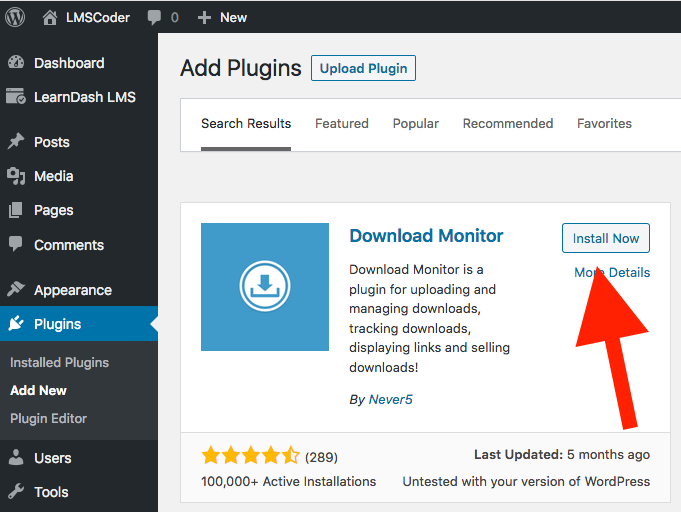
While we’re installing plugins, install the paid addon you purchased in Step #2.1 as well.
Step #2.3: Gather two files
One for each of our non-control test users. Feel free to download mine.
file-for-user-id-2.txt and file-for-user-id-3.txt.
If you opt to not use user-specific download protection functionality, at the very least make sure your file names are not named like mine, as they are at risk for enumeration.
In other words, a bad actor could note the pattern, and keep guessing file names like file-for-user-id-4.txt, file-for-user-id-5.txt, and so on…and potentially download files not intended for them.
Step #2.4: Add your files to Download Monitor
We’ll walk through one example with file-for-user-id-2.txt.
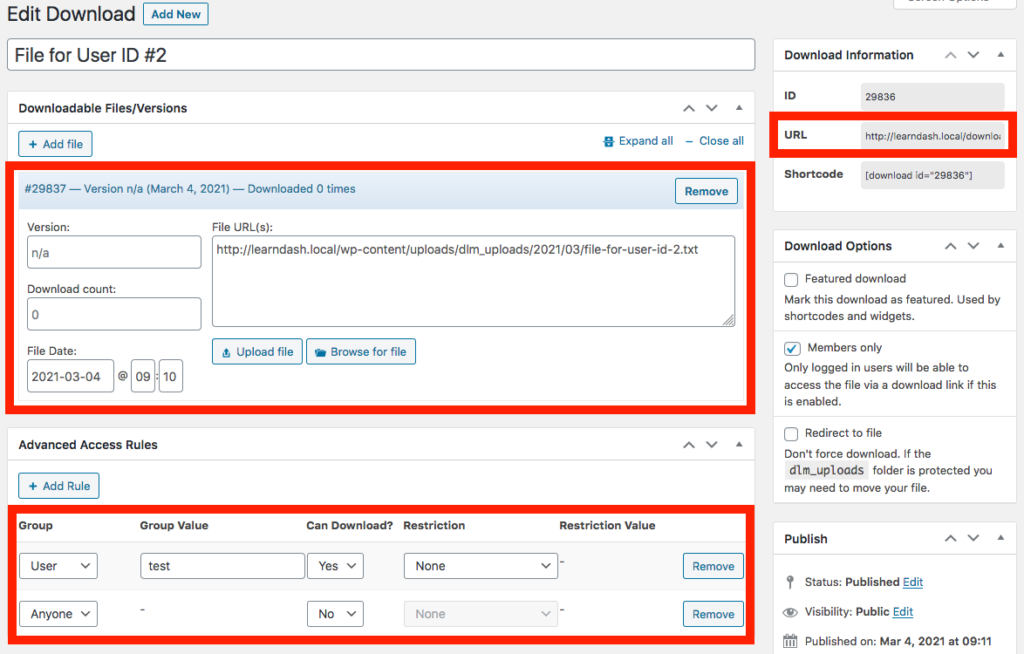
From here, we’ll get a URL like http://learndash.local/download/29836/ that will require a specific user to be logged in before being allowed access to the file.
A few notes:
- Download Monitor “Downloads” can technically include more than one file. We’re just using one.
- As per the AAM documentation, we need to specify a username for the “User” Access Group.
Now, you can configure another user-specific download on your own for practice!
Step #2.5: Ensure files can only be accessed by the right people
Steps from here could include:
- Be sure to test if the DM-generated link (i.e.
http://learndash.local/download/29836/) can be accessed by another user not supposed to access it. - Be sure to test if direct access to the file (i.e.
http://learndash.local/wp-content/uploads/dlm_uploads/2021/03/file-for-user-id-2.txt) is possible in an Incognito window.
Direct access protection should work automatically for Apache/.htaccess servers, although not all websites run Apache.
If Nginx is detected, for example, Download Monitor offers in-app guidance.

The message states:
Because your server is running on nginx, our .htaccess file can’t protect your downloads.
Please add the following rules to your nginx config to disable direct file access:
location /wp-content/uploads/dlm_uploads {

deny all;

return 403;

}
Please contact your web hosting support if you’re not sure how to do this.
Step #2.6: Circle back to your user-specific content
After you’ve ensured the user-specific download link works as expected, you have a few options.
You *could* send it in an email, text, whatever, although why not just plug it back into the user-specific content we set up earlier?
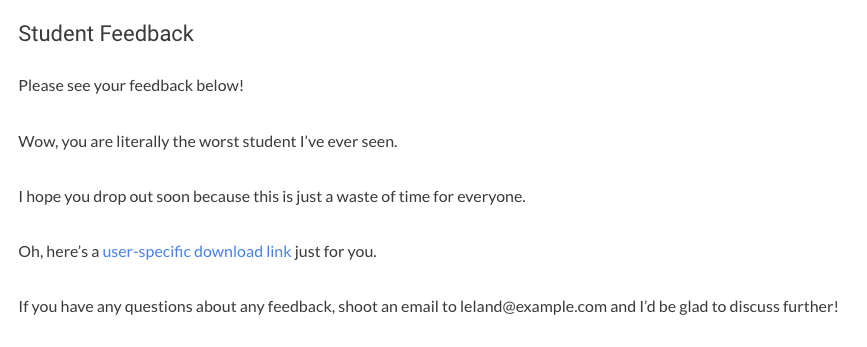
So in our example, we’d add the following sentence to our user-specific content for user ID #2 like so:
[student user_id="2"]Wow, you are literally the worst student I’ve ever seen.
I hope you drop out soon because this is just a waste of time for everyone.
Oh, here’s a <a href="http://learndash.local/download/29836/">user-specific download link</a> just for you.
[/student]
Which should result in the following view for User ID #2:
And at this point, we’re done!