How to move the comment form above the comment list in LearnDash Focus Mode
There are two main components that comprise WordPress comments.
There’s the comment form, and there’s the comment list.

Most of the time, you’ll see the comment form display below the comment list.
I suppose, this is to encourage the writers of new comments to read through the existing comments before leaving their own.
If you’d prefer to move the comment form above the comment list, that’s okay. Since it’s your site, you decide what’s best for your students!
In this tutorial, I’ll show you a couple ways to move the comment form above the comment list in LearnDash Focus Mode.
While there is not a built-in option for that in LearnDash (kind of like there isn’t one in WordPress, although you may find such an option in some themes), it’s a pretty straightforward task to complete.
We’re making the following assumptions:
- You are using LearnDash Focus Mode and not relying on your WordPress theme for comment display functions.
- You do not have any LearnDash template overrides in place, such as from a theme like BuddyBoss.
- You are leveraging built-in WordPress comment functions, and not using something like wpDiscuz.
- You are not otherwise customizing the LearnDash Focus Mode comments template, such as by inserting new elements through WordPress action hooks, or JavaScript functions.
Sound good? Let’s begin!
Method #1: Custom CSS
While my first thought was to do a template override (we’ll cover that below), I found a way to achieve this through Custom CSS.
There’s nothing that quite compares to the convenience of pasting a little CSS snippet on your site.
This can be done with CSS Flexbox. There’s a lot that can be done with Flexbox, and CSS Tricks is a great place to learn in depth.
For the purposes of this tutorial, we’ll be mainly focused on ordering flex items.
Basically, this can make it possible (with nothing but CSS!) to rearrange the order of child elements within a container.
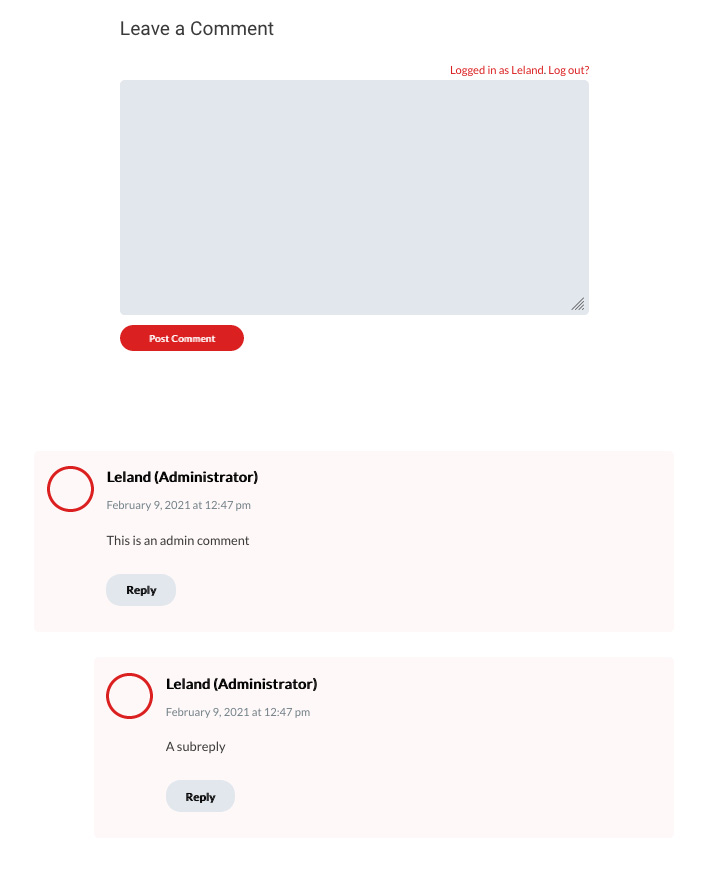
Here’s our before view of Focus Mode comments, without any customization.

Now, apply the following Custom CSS to your website:
.ld-focus-comments {
	display: flex;
	flex-direction: column-reverse;
}
Since there are only two elements within the .ld-focus-comments we can get away with a simple reverse.
The following alternative would achieve the same effect, using the order attribute on child elements, with “column” (non-reversed) direction:
.ld-focus-comments {
	display: flex;
	flex-direction: column;
}

.ld-focus-comments__form-container {
	order: 1;
}

.ld-focus-comments__comments {
	order: 2;
}
A bit more verbose, so I’d lean toward the previous (and more elegant) column-reverse snippet, unless you need more fine-grained control over ordering for some reason.
This should only be needed if you are further customizing the LearnDash Focus Mode comments area, and have more than two children of .ld-focus-comments.
Anyhoo, here’s our after view:

Easy, right?!
There are some snags, like if you require Internet Explorer support, as that doesn’t look too promising.
From there, you have a few options:
- Use a JavaScript polyfill for Flexbox
- Forget about IE11 support, and/or convince your client to do the same. In this context, the “worst case scenario” may be that the comment form and comment list remain in their original position.
- Use a template override instead (in other words, “physically” move the elements in the HTML markup)
Method #2: Template Overrides
While the CSS-only solution detailed above is simple and elegant, and should be adequate in most situations, you may prefer to “physically”
This is a perfect use case for LearnDash Template Overrides.
The specific template file we’re looking for can be found here: wp-content/plugins/sfwd-lms/themes/ld30/templates/focus/comments.php
So open that, and copy the contents over to a new file here: wp-content/uploads/learndash/templates/ld30/focus/comments.php
Unless you have already overridden another Focus Mode template, you will need to create some of these subdirectories.
On a staging environment, make an attempt to “swap” the comment list. This should be handled with care, as there is some logic mixed in with the HTML markup.
One out-of-place curly bracket, for example, could result in an error of some sort.
There are also some action hooks, like learndash-focus-content-comment-form-after, for example.
This is intended to be placed after the comment form. In the interest of preserving the original functionality of the template file, I’ll keep them in their intended places.
Make an attempt to break this down on your own, and swap the comment list and comment form in your overridden template, for practice.
Here’s what I figured out:
The comment list and comment form can be neatly broken down (hooks, logic, and all) as illustrated in the following screenshot.

As LearnDash continues to update their software, the exact line numbers may differ over time, although the essence should remain.
Basically, all you need to do is cut-and-paste the comment form code above the comment list code, save the file in the override path. And you should be set.
I will not provide the amended comments.php file, so if you’re struggling with that or other items described in the tutorial, I suggest persevering.
It will be so satisfying once you figure it out on your own!
Or, you may book a one-on-one coaching call with me to hop on a screen share for further assistance, as being stuck may not be the best use of your time.