How to spice up your LearnDash comments with wpDiscuz
Imagine you’re a student in an online course, and you have a question regarding the content a particular lesson.
You scroll down, beneath the lesson content, find the Comments section, and see someone else had the same question, and it was already answered!
So convenient! Comment sections beneath lesson content can:
- Alleviate pressure on the instructor by letting community members to step up and answer questions.
- Alleviate pressure on the instructor by letting community members read existing comments that answer their questions.
Basically, comments can make your life as a course instructor easier.
They do have some downsides, like needing to moderate off-topic trollfests, although let’s just assume your community is generally well-behaved.
Warning to Shared Course Steps users, before we begin
Note that this may not work as you would like them to in Shared Course Steps.
I did a quick test and noticed that a comment made in a lesson shared between two courses will show up in both courses.
If that’s cool with you, please disregard. If not, please consider using Shared Post Parts instead.
How comments in LearnDash work by default
Not much different than comments in WordPress itself.
LearnDash simply leverages WordPress’s built-in commenting functionality.
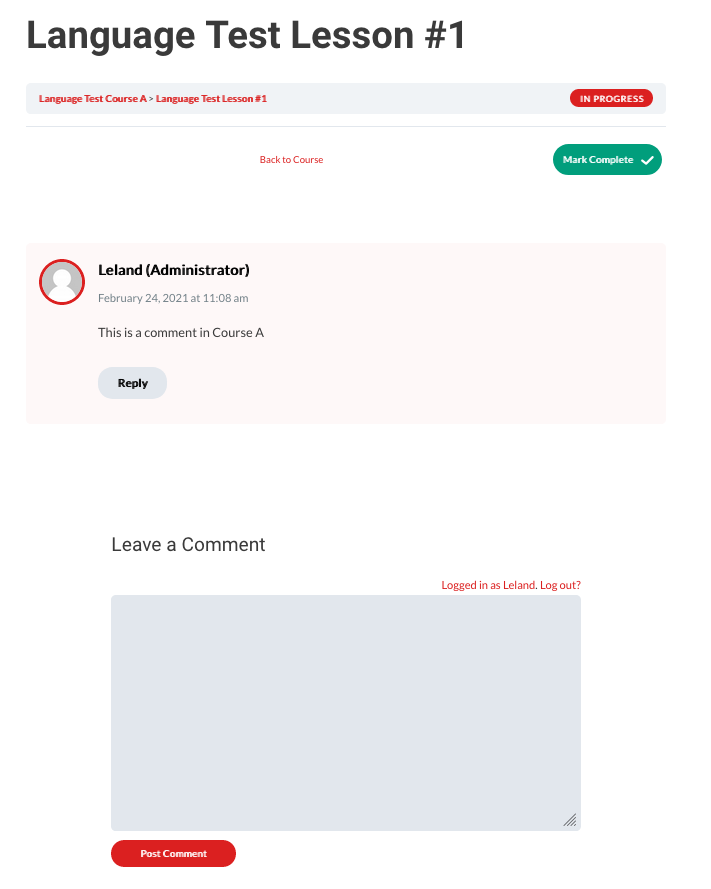
So if you think default WordPress comments are boring, you’ll probably think the same of LearnDash comments.
WordPress (and by association, “LearnDash” …as we’ll cover in this tutorial) comments can be spiced up with a number of plugins.
One popular option is wpDiscuz, so we’ll be digging into that.
How to spice them up
Since LearnDash does not leverage the WordPress core comments_template function that many third-party comment spicification plugins tap into, a tiny extra step is needed to get them working in LearnDash.
Depending on the third-party comment plugin used, it may not recognize LearnDash post types out of the box, so we’ll need to address that as well.
Step #1: Install the wpDiscuz plugin
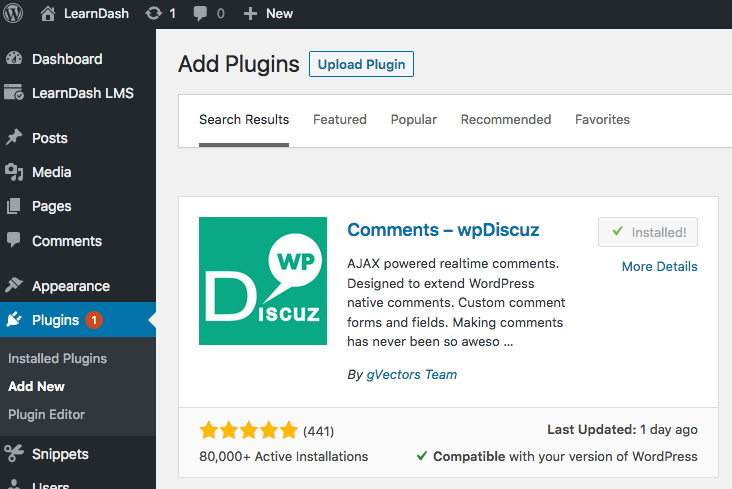
Install wpDiscuz it however you prefer to install free WordPress plugins hosted on WordPress.org.
For example, in your WordPress backend:
- Go to Plugins → Add New
- Search for “wpdiscuz”
- Click “Install” and then “Activate”
Step #2: Observe the spiciness of WordPress blog post comments
After activating the plugin, check out a normal WordPress blog post.
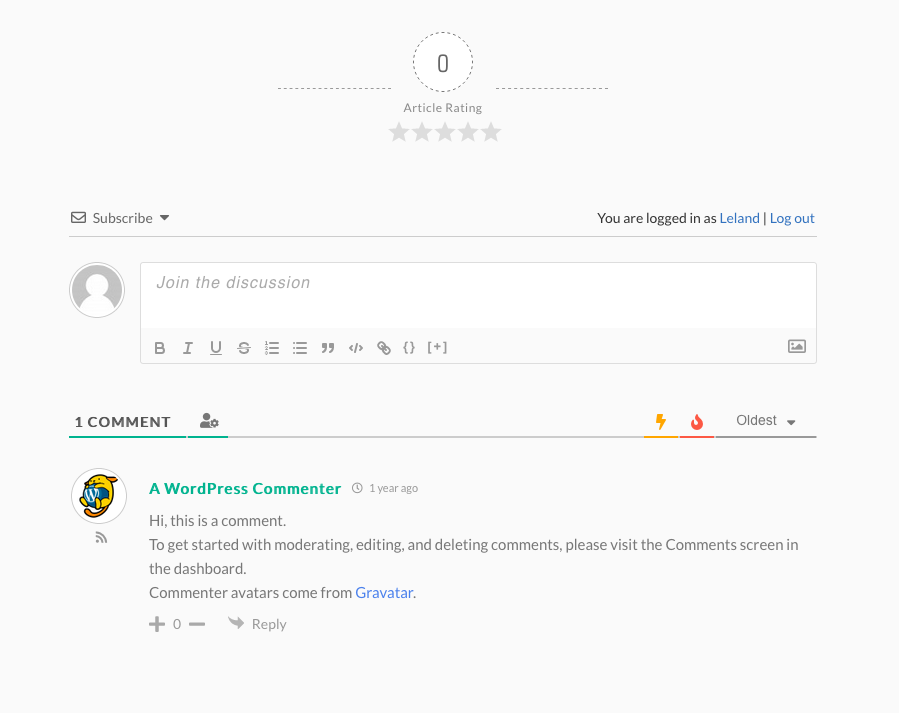
The spiciness will be immediate and apparent with no further configuration.
Upvoting/downvoting. Sorting by oldest, newest, and most voted. Email subscription feature.
You will also be prompted to “complete the installation” by selecting a few options related to layout and functionality.
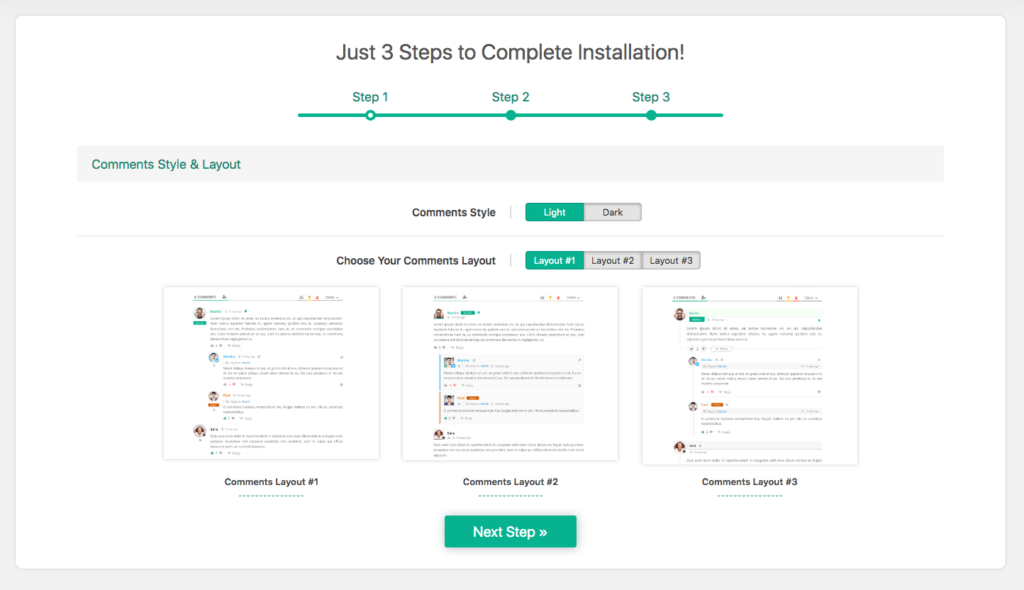
I don’t have any specific recommendations, so I guess just go with whatever your preferences are for now. Settings can be changed later if needed.
While wpDiscuz has some paid addons, I’m actually quite surprised at the functionality available in just the free version.
Step #3: Observe the unchanged nature of LearnDash lesson comments
Navigate to some LearnDash content, let’s say a lesson, and you’ll notice the comment form is unchanged.

I promise this is not a big deal. All we need to do is make a very tiny settings change and do a tiny template override.
Step #4: Enable the wpDiscuz form on the LearnDash post types
While wpDiscuz is enabled out of the box on WordPress default post types like post and page, we need to add support for custom post types.
Step #4.1: Enable support for the LearnDash post types
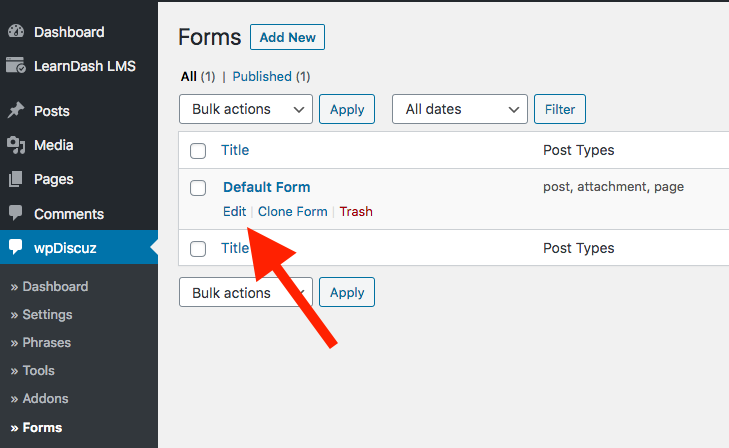
- Go to wpDiscuz → Forms
- Edit the Default Form
- Scroll to the Display comment form for post types section
- Check off sfwd-lessons and sfwd-topic
- Click the blue Update button
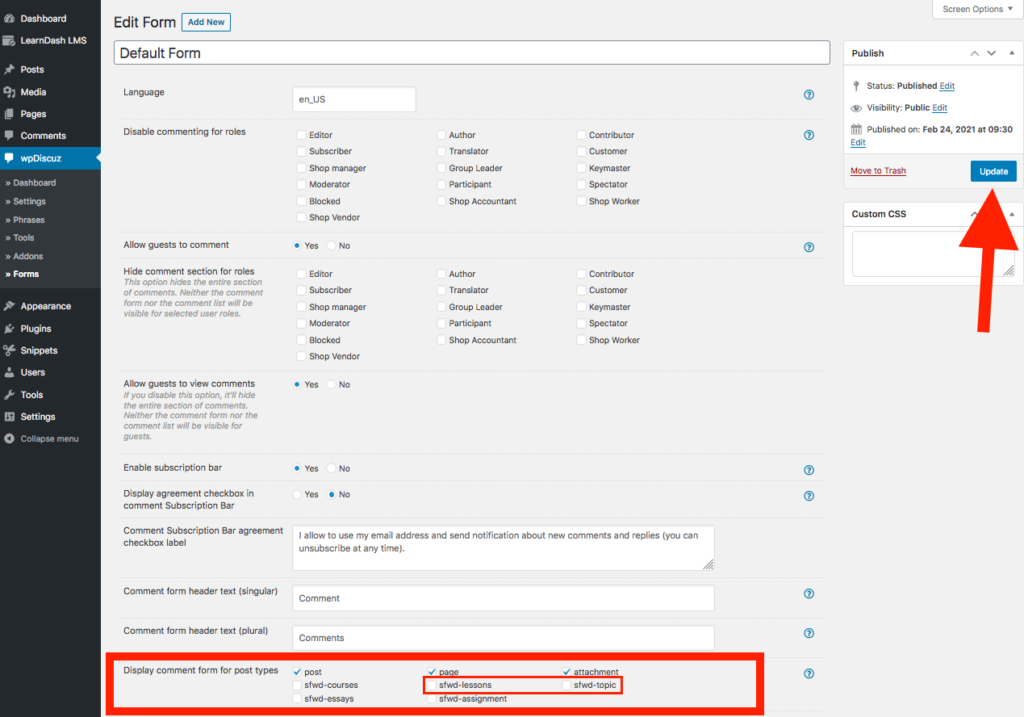
There may be other options on this screen you may wish to enable, although the most important ones are those checkboxes next to sfwd-lessons and sfwd-topic.
Step #4.2: HELP! I don’t see sfwd-lessons and/or sfwd-topic
You probably don’t have comments enabled on these post types. No worries though, this can be changed in a few clicks.
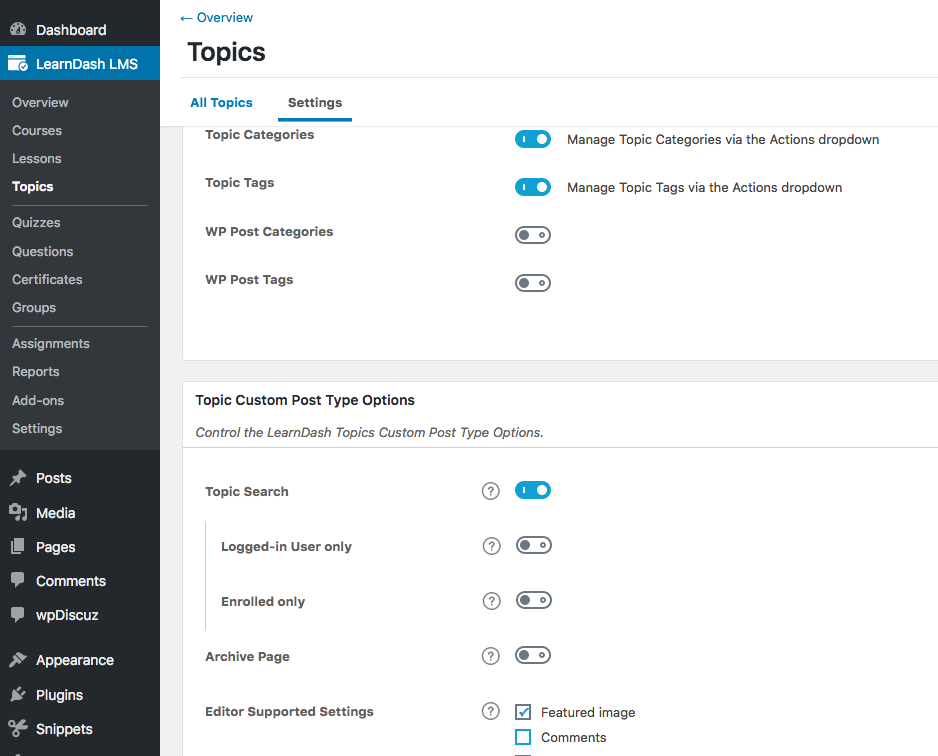
For more details on enabling WordPress-based comment functionality in LearnDash, see this article on LDX.design.
Step #5: Do a LearnDash template override
Same as this tutorial, the specific template file we want to override can be found here: wp-content/plugins/sfwd-lms/themes/ld30/templates/focus/comments.php
Unlike that previously linked tutorial, we don’t need any of the code in that file.
Step #5.1: Make a new file
Simply make a new file located here: wp-content/uploads/learndash/templates/ld30/focus/comments.php
Unless you have already overridden another Focus Mode template, you will need to create some of these subdirectories.
Step #5.2: Reference the comments_template function
In that newly-created file, put nothing in it but the following:
<?php

comments_template();
At this point, we’ve come full circle with the statement made earlier in this tutorial:
Since LearnDash does not leverage the WordPress core comments_template function that many third-party comment spicification plugins tap into, a tiny extra step is needed to get them working in LearnDash.
With this template override, now LearnDash does leverage the WordPress core comments_template function.
Step #5.3: Confirm the template override is in effect
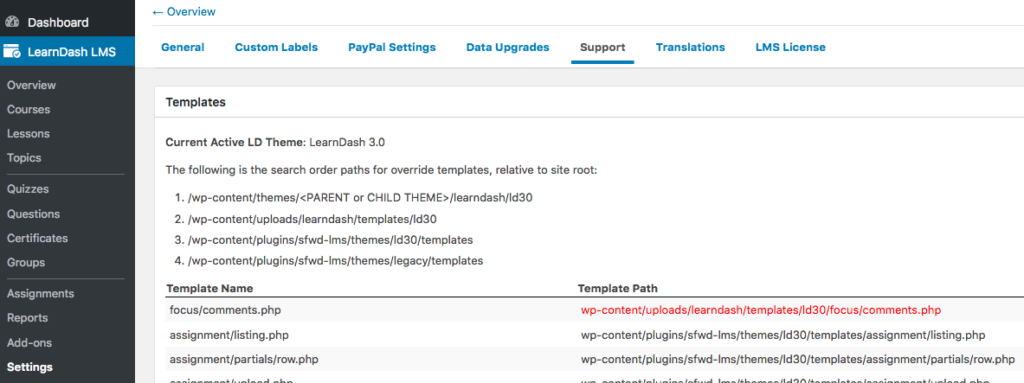
- Go to LearnDash → Settings → Support
- Scroll to the Templates section
- Confirm the template override accordingly
Step #6: Observe the spiciness of LearnDash lesson comments
At this point, we’re all done!
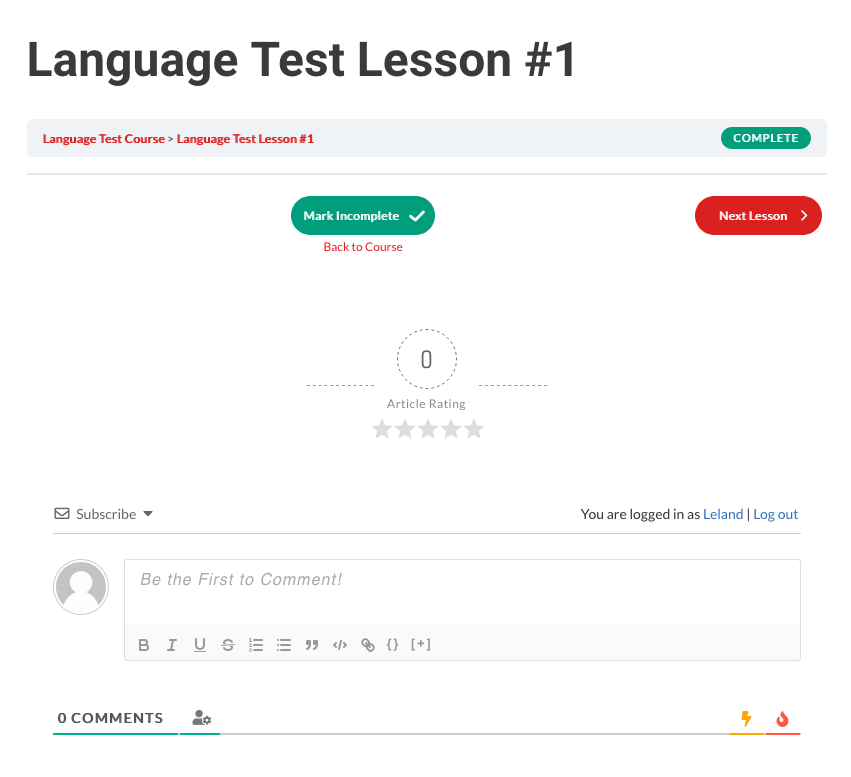
wpDiscuz should now be enabled on LearnDash lessons and topics.
Other quirks
Given the virtually unlimited ways behaviors can be customized in WordPress/LearnDash/wpDiscuz along with other plugins and themes, this tutorial may not suitable for your use case.
I do recommend testing on a staging environment to ensure your needs and expectations are fully met, and comparing to default functionality for differences.
There may be some quirks and I can’t guarantee things will work exactly as you’d like them to.
If you feel you need some extra one-on-one help, I am available for hire. Thanks for reading!